Merhaba arkadaşlar,
Sizlere Ubuntu-14.04 sunucusunu sıfırdan ayağa kaldırıp, kendi rails uygulamalarınızı sunucuya hızlı bir şekilde aktarabileceğiniz Capistrano uygulamasından bahsedeceğim ve bazı kaynak kodlar paylaşacağım. Kullandığım capistrano’nun versiyonu 3.4’tür. Sunucu üzerinde kullandığım ruby versiyonu ise 2.2.3’tür. Capistrano’nun kaynak kodlarına github adresinden erişip göz atabilirsiniz. Ben kendi uygulamalarımda sunucu olarak DigitalOcean kullanıyorum. DigitalOcean’dan alacağınız 10 $’lık bir sunucuyu aşşağıda vereceğim bash scriptleri ile 2-3 saat içinde ayağa kaldırıp Nginx, Postgresql, Unicorn ayarlarını yaparak çalışır hale getirebilirsiniz.
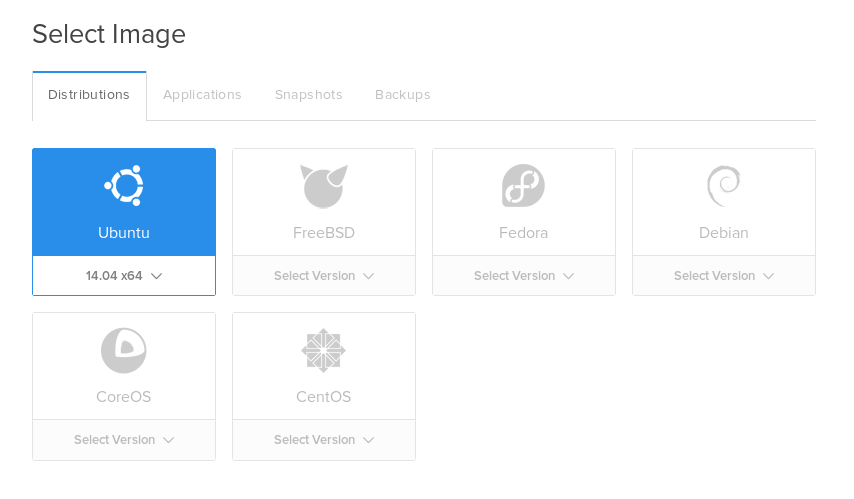
Şimdi izliyeceğimiz adımlar gelecek olursak, öncelikle DigitalOcean’dan yeni bir Droplet oluşturuyoruz ve dağıtım olarak Ubuntu 14.04 seçiyoruz.
Sunucuda ruby ortamı için temel kurulum scripti aşağıdaki gibidir. Bu script root kullanıcısı olarak bağlanıp çalıştırmalısınız.
Sunucuda deploy kullanıcısı için kurulum scripti aşağıdaki gibidir. Bu script’ide root kullanıcısı olarak bağlanıp çalıştırmalısınız.
Sunucuda deploy kullanıcısı için ruby ortamını hazırlama scripti aşağıdaki gibidir. Bu script deploy kullanıcısı olarak bağlanıp çalıştırmalısınız.
Bu scriptler ile sunucunuzu bir rails uygulamasını çalıştıracak duruma getirmiş olursunuz.
Şimdi bir rails uygulaması oluşturup, uygulamayı bir sunucuya aktarma işlemlerini anlatacağım.
Ruby On Rails bildiğiniz ruby dili ile, MVC(Model-View-Controller) mimari deseni ile geliştirilmiş ve bünyesinde DRY(Don’t Repeat Yourself), CoC(Convetion over configuration) gibi yazılım felsefelerini barındıran açık kaynak bir uygulama çatısıdır.
Hızlı bir Ruby On Rails uygulaması çıkarmak istiyorsanız size Cybele ruby gem’ini öneririm. Bu gem bir uygulamada olması gereken kullanıcı giriş, bilgi güncelleme, yönetici tarafına giriş işlemleri gibi her projede kullanacağınız kısımlar hazır bir taslak olarak geliyor. Bu sayede önceden yazdığınız kodları tekrar yazmak zorunda kalmıyorsunuz. Cybele geminin taslak olarak getirdiği Gemfile’ı github adresinden inceleyebilirsiniz. Sunucuya kolay bir şekilde uygulamayı taşımak için kullancağımız gemler bu Gemfile’da yer almaktadır.
Eğer rails new project_name şeklinde sıfırdan bir proje oluşturursanız veya halihazırda bulunan bir projenizi sunucuya taşımak isterseniz, kullanacağım komutlar dizisinin yer aldığı recipes_matic gemini incelemenizi tavsiye ederim.
Ben cybele ile oluşturduğumuz bir proje için bu adımları anlataçağım.
- Proje oluştur
$ cybele project_name - Deploy repo bilgilerini düzenle
/config/deploy.rbset :repo_url, 'git@github.com:your_username/your_repo_name.git'
- Production deploy bilgilerini düzenle
/config/deploy/production.rbserver "example.com", user: "#{fetch(:local_user)}", roles: %w{app db web}, primary: true, port: 22 set :rails_env, 'production' set :branch, 'master' set :project_domain, “example.com” - Staging deploy bilgilerini düzenle
/config/deploy/staging.rbserver "staging.example.com", user: "#{fetch(:local_user)}", roles: %w{app db web}, primary: true, port: 22 set :rails_env, 'staging' set :branch, 'develop' set :project_domain, “staging.example.com” - Hata bildirimleri için email adresini düzenle
config/environments/production.rb
config/environments/staging.rbconfig.middleware.use ExceptionNotification::Rack, :email => { :email_prefix => "[project_name]", :sender_address => %{"Notifier" <notifier@project_name.com>}, :exception_recipients => %w{your_email@address.com} } - Aşağıdaki dosyalarda SMTP ayarlarını ayarla
config/settings/staging.yml
config/settings/production.yml - Github da bulunan private repolara lokaldeki gibi erismek icin şu komutları çalıştır
$ eval `ssh-agent -s`
$ ssh-add - Gelelim terminalden çalıştırmamız gereken komutlar dizisine,Production sunucusunda ki deploy ortamının hazır olup olmadığını kontrol eder.
$ bundle exec cap production deploy:check
Production sunucusunda nginx, postgresql, unicorn, backup(veritabanı yedek alma gemi) gibi ayarları yapar.
$ bundle exec cap production deploy:prepare
Production sunucusuna deploy işlemini gerçekleştirir.
$ bundle exec cap production deploy
Örnek dosyalarımızda şu şekilde olmalıdır.
Proje anadizininde bulunan Capfile örneği:
# Load DSL and set up stages
require 'capistrano/setup'

# Include default deployment tasks
require 'capistrano/deploy'
require 'capistrano/rails'
require 'capistrano/bundler'
require 'sshkit/sudo'
require 'capistrano/maintenance'

# Include tasks from other gems included in your Gemfile
#
# For documentation on these, see for example:
#
#   https://github.com/capistrano/rvm
#   https://github.com/capistrano/rbenv
#   https://github.com/capistrano/chruby
#   https://github.com/capistrano/bundler
#   https://github.com/capistrano/rails
#   https://github.com/capistrano/passenger
#
# require 'capistrano/rvm'
# require 'capistrano/rbenv'
# require 'capistrano/chruby'
# require 'capistrano/bundler'
# require 'capistrano/rails/assets'
# require 'capistrano/rails/migrations'
# require 'capistrano/passenger'

# Load custom tasks from `lib/capistrano/tasks` if you have any defined
Dir.glob('lib/capistrano/tasks/*.rake').each { |r| import r }
Proje config dizininde bulunan deploy.rb örneği:
# config valid only for current version of Capistrano
lock '3.4.0'

set :application, 'appname'
set :local_user, 'deploy'
set :stages, %w(staging production)
set :default_stage, 'production'
set :repo_url, "git@github.com:username/#{fetch(:application)}.git"

# Default branch is :master
# ask :branch, `git rev-parse --abbrev-ref HEAD`.chomp

# Default deploy_to directory is /var/www/blog2
set :deploy_to, "/home/#{fetch(:local_user)}/apps/#{fetch(:application)}"

# Default value for :scm is :git
set :scm, :git

# Default value for :format is :pretty
# set :format, :pretty

# Default value for :log_level is :debug
# set :log_level, :debug

# Default value for :pty is false
set :pty, true

# Default value for :linked_files is []
set :linked_files, fetch(:linked_files, []).push('config/database.yml')

# Default value for linked_dirs is []
set :linked_dirs, fetch(:linked_dirs, []).push('log', 'tmp/pids', 'tmp/cache', 'tmp/sockets', 'vendor/bundle', 'public/system', 'public/upload', 'public/images', 'public/seat_images')

# Default value for default_env is {}
# set :default_env, { path: "/opt/ruby/bin:$PATH" }
set :default_env, { path: '$HOME/.rbenv/shims:$HOME/.rbenv/bin:$PATH' }

# Default value for keep_releases is 5
# set :keep_releases, 5

# Look our recipes
# https://github.com/lab2023/recipes_matic
load 'config/deploy/recipes/base.rb'
Umarım faydalı bir yazı olmuştur.
Kolay gelsin..
Hocam benim bir linux hostingim var sınırsız hosting paketi o hostinge bir sub açıp o subta ruby dosyaları çalıştırma imkanım var mı ya da bana önerebileceğiniz bir yöntem var mı
Merhaba Enes,
Ruby dosyanda içerik olarak ne var bilmiyorum bu yüzden net bir cevap veremeyeceğim. Eğer yazdığın kod bir web uygulaması ise ve bunu bir IP adresinden yayına almak istiyorsan şu linklere göz atmanda fayda var:
http://puma.io
https://rack.github.io
Hocam root yetkisi olmadan çalışmıyor mu sitenin modaretörüyüm kuramaz mıyım
Merhaba turan, gerekli paketlerin kurulumu için root olman gerekiyor. Kullandığın sistemin alternatif yöntemleri olabilir araştırmanda fayda var.